 http://www.solarfamilyfarm.com/wp-content/uploads/2023/08/Roof-Solar-Installation.png
600
800
admin
http://solarfamilyfarm.com/wp-content/uploads/2022/09/LOGO.png
admin2023-08-18 11:45:402023-08-18 13:43:35Can You Install Solar Panels on Tile Roofs? A Comprehensive Guide
http://www.solarfamilyfarm.com/wp-content/uploads/2023/08/Roof-Solar-Installation.png
600
800
admin
http://solarfamilyfarm.com/wp-content/uploads/2022/09/LOGO.png
admin2023-08-18 11:45:402023-08-18 13:43:35Can You Install Solar Panels on Tile Roofs? A Comprehensive GuideSolar energy system to the world
Take a quick look at our solar system renewable energy and sustainable energy blog posts
http://www.solarfamilyfarm.com/wp-content/uploads/2023/08/Roof-Solar-Installation.png
600
800
admin
http://solarfamilyfarm.com/wp-content/uploads/2022/09/LOGO.png
admin2023-08-18 11:45:402023-08-18 13:43:35Can You Install Solar Panels on Tile Roofs? A Comprehensive Guide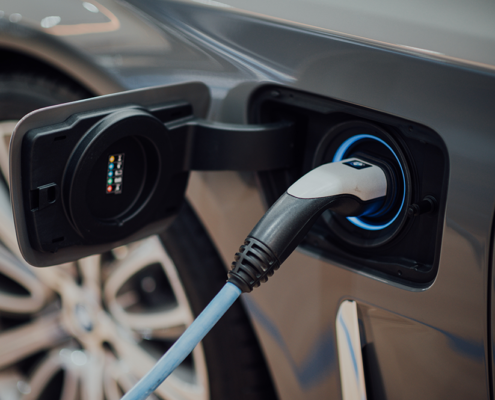 http://www.solarfamilyfarm.com/wp-content/uploads/2023/07/EV-Charging.png
665
1000
admin
http://solarfamilyfarm.com/wp-content/uploads/2022/09/LOGO.png
admin2023-07-18 13:53:362023-08-18 14:15:40How Many Solar Panels Do You Need to Charge Your Electric Car?
http://www.solarfamilyfarm.com/wp-content/uploads/2023/07/EV-Charging.png
665
1000
admin
http://solarfamilyfarm.com/wp-content/uploads/2022/09/LOGO.png
admin2023-07-18 13:53:362023-08-18 14:15:40How Many Solar Panels Do You Need to Charge Your Electric Car?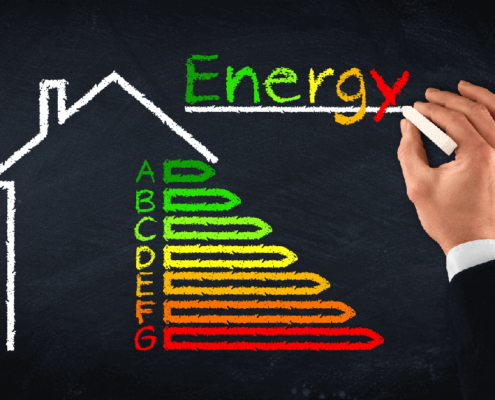 http://www.solarfamilyfarm.com/wp-content/uploads/2022/09/Lower-Your-Power-Bill-With-Electricity-Usage-Monitoring.png
658
1000
admin
http://solarfamilyfarm.com/wp-content/uploads/2022/09/LOGO.png
admin2023-04-19 09:16:092023-08-16 17:10:36Lower Your Power Bill With Electricity Usage Monitoring
http://www.solarfamilyfarm.com/wp-content/uploads/2022/09/Lower-Your-Power-Bill-With-Electricity-Usage-Monitoring.png
658
1000
admin
http://solarfamilyfarm.com/wp-content/uploads/2022/09/LOGO.png
admin2023-04-19 09:16:092023-08-16 17:10:36Lower Your Power Bill With Electricity Usage Monitoring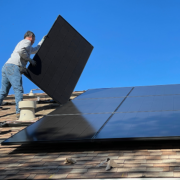
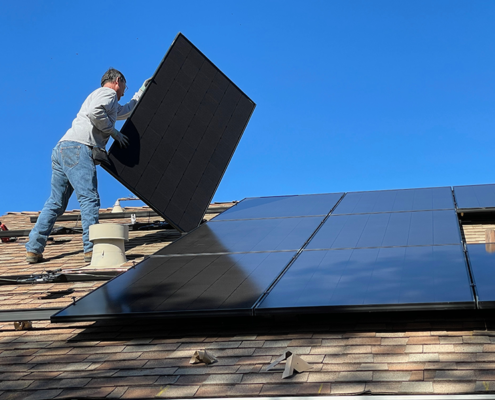
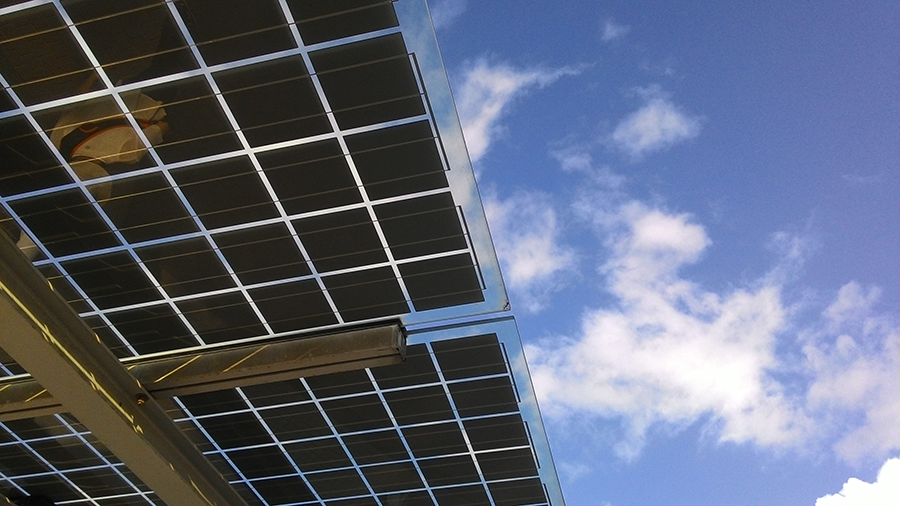
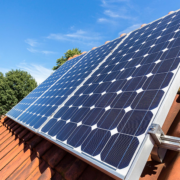
Can You Install Solar Panels on Tile Roofs? A Comprehensive Guide
With the growing emphasis on renewable energy sources and the increasing popularity of solar power, many homeowners are exploring the idea of installing solar panels on their roofs. However, for those with tile roofs, the question arises: Can solar panels be installed on tile roofs? The short answer is yes, but there are important considerations and steps to take to ensure a successful installation. In this guide, we’ll delve into the details of installing solar panels on tile roofs, addressing the benefits, challenges, and best practices.
Benefits of Installing Solar Panels on Tile Roofs
- Energy Savings: Solar panels harness the power of the sun to generate electricity, which can significantly reduce your energy bills over time. By producing your own clean energy, you become less reliant on the grid.
- Environmental Impact: Solar energy is renewable and clean, producing no greenhouse gas emissions or air pollutants. By using solar panels, you contribute to reducing your carbon footprint and helping combat climate change.
- Increased Property Value: Homes with solar panels are often valued higher in the real estate market.
- Buyers appreciate the potential for lower energy bills and the environmentally friendly features of solar-powered homes.
- Low Maintenance: Solar panels generally require minimal maintenance, and most reputable installers offer warranties that cover any potential issues.
Challenges of Installing Solar Panels on Tile Roofs
- Fragility of Tiles: Tile roofs can be more fragile than other roofing materials, such as asphalt shingles. Care must be taken during the installation process to avoid damaging the tiles.
- Weight Considerations: Tiles add weight to the roof structure. Before installing solar panels, it’s essential to ensure that the roof can support the additional load. A structural assessment may be necessary.
- Mounting Methods: Different types of tile roofs require specific mounting methods to avoid leaks and damage. The choice of mounting system depends on the type of tiles you have (clay, concrete, etc.).
- Aesthetics: Some homeowners worry that solar panels might detract from the aesthetics of their tile roofs. However, modern solar panel designs are more visually appealing and can complement various architectural styles.
Best Practices for Installing Solar Panels on Tile Roofs
- Professional Assessment: Before proceeding, consult with a reputable solar panel installer or roofing contractor. They can assess the structural integrity of your roof and recommend the best installation approach.
- Choose the Right Mounting System: There are different types of mounting systems, such as hook-mounted or rail-mounted. Your choice will depend on your tile type and roof structure.
- Tile Removal vs. Non-Penetrating Systems: Some installations require removing tiles and attaching mounts directly to the roof deck, while others use non-penetrating systems that rest on top of the tiles. Each method has its pros and cons, so discuss with your installer.
- Waterproofing and Sealing: Proper waterproofing and sealing are crucial to prevent leaks and damage to your roof. Working with professionals ensures that the installation is watertight and secure.
- Wiring and Electrical Work: The electrical wiring from the solar panels needs to be routed properly and integrated into your home’s electrical system. This step requires expertise to ensure safety and functionality.
Installing solar panels on tile roofs is not only possible but also beneficial for homeowners looking to reduce energy costs and minimize their environmental impact. With the right precautions, professional assistance, and proper installation techniques, you can enjoy the advantages of solar energy without compromising the integrity of your tile roof. When considering solar panel installation, remember to consult with experts, choose the right mounting system, and prioritize the safety and longevity of your roof and solar investment.
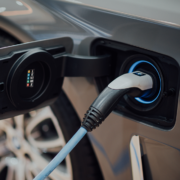
How Many Solar Panels Do You Need to Charge Your Electric Car?
As the world transitions towards sustainable energy solutions, the popularity of electric cars and solar panels continues to soar. Both technologies offer a promising solution to combat climate change and reduce our dependence on fossil fuels. One exciting synergy between these two innovations is using solar panels to charge electric vehicles (EVs). But, how many solar panels do you actually need to power up your electric car? Let’s delve into the specifics of this intriguing question.
Understanding the Basics
To determine the number of solar panels required to charge your electric car, it’s important to consider a few key factors:
- Energy Consumption of Your Car: The energy consumption of an EV can vary based on factors such as its battery capacity, efficiency, and driving conditions.
- Charging Efficiency: Charging your EV using solar panels involves converting sunlight into electricity, then transferring that energy to your car’s battery. Some energy is lost during these conversion and transfer processes.
- Solar Panel Efficiency: The efficiency of solar panels varies, with newer panels generally offering higher efficiency rates. This affects how much energy they can generate from the available sunlight.
- Daily Sunlight Hours: The amount of sunlight your location receives per day impacts how much energy your solar panels can generate.
- Battery Capacity: The capacity of your EV’s battery is important since it determines how much energy you need to fully charge the vehicle.
Calculating Solar Panel Requirements
To calculate the number of solar panels needed, follow these steps:
- Determine Your Car’s Energy Consumption: Find out the energy consumption of your EV in watt-hours per mile or kilometer. This information can often be found in your car’s manual or specifications.
- Calculate Daily Energy Requirement: Multiply your car’s energy consumption by the number of miles or kilometers you plan to drive in a day. This gives you the daily energy requirement in watt-hours.
- Consider Charging Efficiency: Account for charging efficiency. Solar panels generate direct current (DC) electricity, which needs to be converted to alternating current (AC) for your car. This conversion incurs some energy loss.
- Incorporate Solar Panel Efficiency: Divide your daily energy requirement by the solar panel’s efficiency to determine the actual energy your panels need to generate.
- Account for Sunlight Hours: Divide the energy generated by your solar panels by the average sunlight hours in your location. This gives you the power output per hour.
- Divide by Panel Capacity: Divide the hourly power output by the capacity of a single solar panel to find out how many panels you need.
- Finalize the Calculation: Round up the number of panels to the nearest whole number for practicality. Keep in mind that the number may change based on real-world variables like weather conditions.
Harnessing the power of the sun to charge your electric car is a sustainable and forward-thinking solution. The exact number of solar panels you’ll need depends on various factors such as your EV’s energy consumption, solar panel efficiency, and the amount of sunlight your location receives. Remember, the goal is not only to meet your daily driving needs but also to potentially generate excess energy that can be fed back into the grid or stored for later use. As technology advances and solar efficiency increases, the integration of solar power and electric vehicles will become even more practical and impactful. So, if you’re looking to make your daily commute greener and more eco-friendly, crunching the numbers and investing in solar panels could be a bright idea.
Lower Your Power Bill With Electricity Usage Monitoring
A simple trend analysis, or for that matter a brief glance at a news or business website will quickly reveal that the price of power is rapidly rising (about 4.3% per annum since 2020) – and that trend does not seem to show any signs of slowing down in the immediate future.
Homeowners are also under pressure from the increasing costs of consumer goods and many other household expenses – it is becoming more challenging to make ends meet and any savings on the expenses that eat into the household budget are very welcome.
This is why many homeowners are looking at ways to save money on their power bills. But an old business saying can just as easily be applied to power use – ‘if you can’t measure it, you can’t manage it.’

Prioritizing energy efficiency is one of the challenges that every homeowner faces when installing a solar system for their houses, but just how do you reduce the amount of power that your household consumes?
One of the first steps that any homeowner needs to take is to evaluate which appliances and applications are consuming the most power in the home.
There are a variety of ways this can be accomplished. There are compact power usage meters that can track the power consumed by an appliance by simply being plugged into the wall socket that supplies power to the appliance. On the other end of the scale are smart monitoring systems that keep track of electricity usage throughout the home.
You will be aware of just how much electricity is being consumed in the home on a monthly basis – that number will appear on your utility bill. However, in order to lower your electricity use, you need far more detail than is supplied on your monthly bill – and that is where electricity usage monitoring comes into play.
Once you have identified which appliances are the most power-hungry it’s time to take proactive steps to reduce the watts that your household consumes. One of the easiest and most effective ways to do this is to invest in low-wattage appliances – and to switch off those that consume higher volumes of power when they are not in use. Switch these appliances off at the socket as they continue to use electricity even when in standby mode (there is even a name for this sort of power consumption – ‘phantom load’). It is estimated that ‘Phantom Load’ can add between 5% and 10% to your electricity bill.
There is another advantage to closely monitoring your power consumption – it makes managing household finances much easier. Energy management makes monthly bills more predictable. You will be aware of just how much energy you are using and the devices and appliances that are responsible for the lion’s share of that consumption – and can make adjustments accordingly.
Of course, you could also evaluate solar energy. It has been estimated that solar can save an average household up to $1,500 per year. However, you will still need to invest in an electricity usage monitoring device to ensure that you get the most out of a solar array and storage options.
Investing in an electricity usage monitoring system holds the key to reducing household energy consumption. Take the first step today and begin saving money immediately.
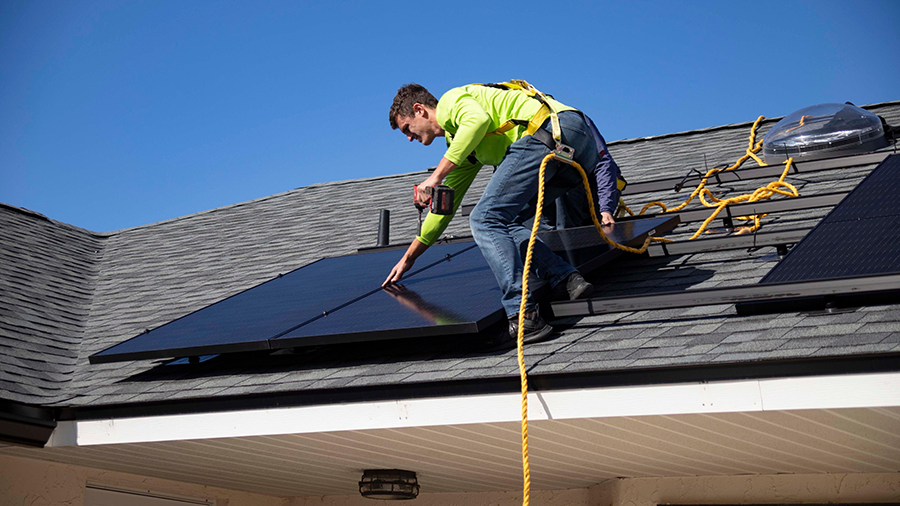
What’s The Total Amount Of Time Needed To Install Solar Panels?
Given that household expenses seem to be spiraling ever upward, most households are looking to cut back on monthly costs. One of the major expenses faced by every household is the cost of electricity. These costs are also escalating due to a variety of global geo-political disruptions to the flow of fossil fuels – and also the supply chain challenges that have been faced by many solar panel installers.
However, those who are intent on realizing savings on their electricity bill may have to move quickly. Although the existing federal ‘Solar Tax Credit‘ was recently increased and extended, net metering and other incentives to buy are under the microscope in many parts of the United States – and decisions on those issues may impact the viability of solar panels for those who wait around for too long.
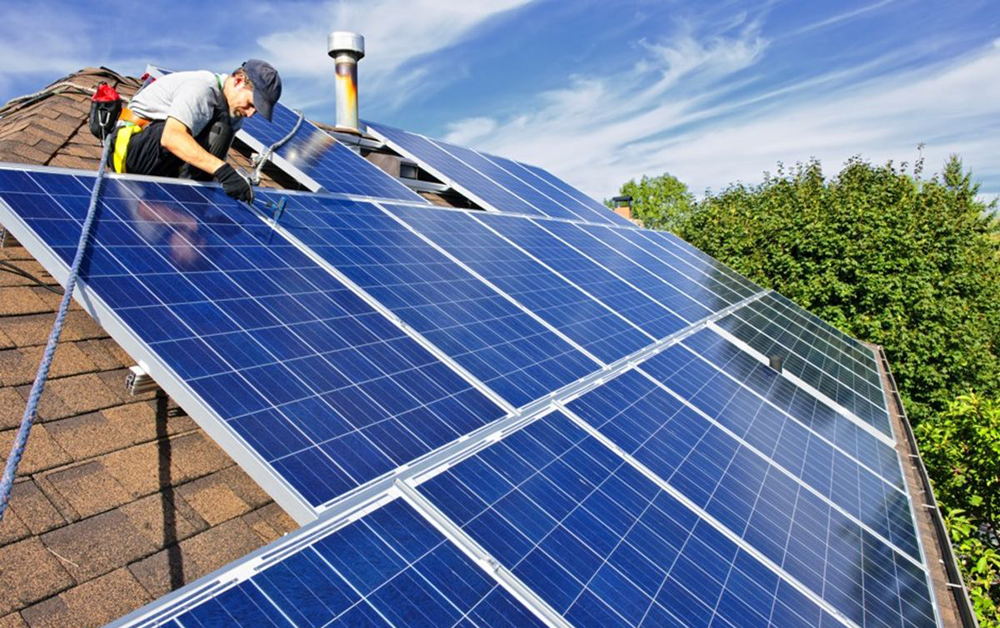
Given the urgency of the situation, homeowners need to know that installing solar panels is not just a matter of attaching the panels and installing other equipment such as inverters and storage. That will usually be done within three days. It is the preparation and requirements for the installation of solar panels that will take significantly longer than actually fitting the panels.
The first step is to select a reputable solar installer who will be able to advise you on the most suitable types and location/orientation of your solar panels, it is always a good idea to use a company that can offer you a good solar finance option for your installation. Make sure to compare quotes and match like with like. Ensure that the estimate you receive has no hidden costs – you do not want any nasty surprises when you get your final bill. Also, remember to discuss timelines with him. Solar installation is a highly competitive industry – and that means that competition for business is fierce. But take into account the fact that the lowest cost is not always the best, and companies that pressure you into signing on the dotted line are not always the best choice – make sure that your solar installer is experienced and has a good reputation.
Once you have signed your solar panel installer will inspect your roof and design a system that takes into account any unique features, as well as your energy requirements. They will take into account shade from trees near the home – and will also inspect the roof to ensure that it is in good shape and will cope with the weight of the panels.
Your installer will take care of the necessary permits that are required from the city or local authorities. This used to be a lengthy process, but many local governments have made the decision to fast-track solar permits – but permits can take anywhere from three to eleven weeks.
Once the solar panels have been installed then the city will send around an inspector to ensure that it conforms to local requirements. This process can take around two weeks (however, there have been reports of the process taking up to eight weeks).
It is only then that you can flip the switch and start enjoying the benefits of solar power – and reducing your electricity bills. Time is of the essence if you want to take advantage of some incentives – so don’t delay – make the decision to switch to solar power today.
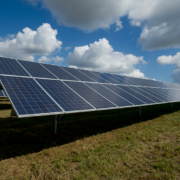
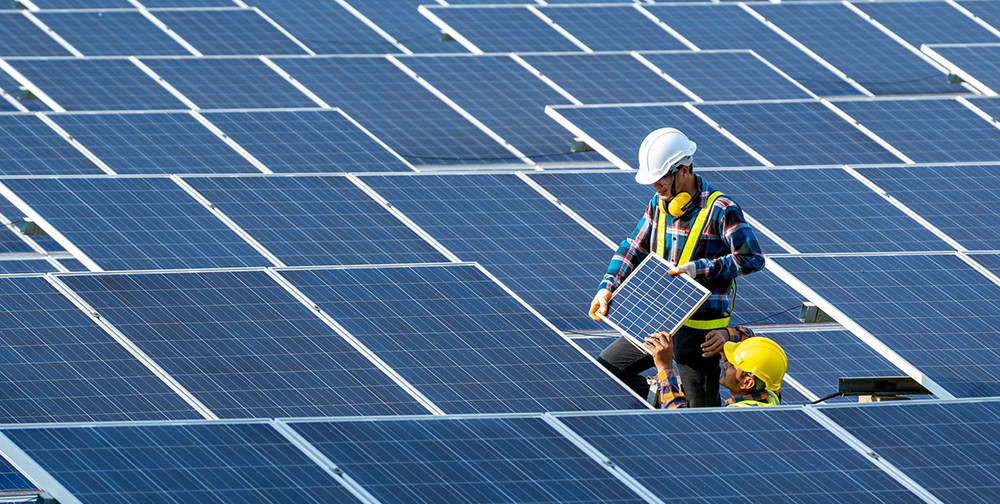
Learning More About Solar Farms
For anyone who has one eye on the news media, it should come as no surprise that the cost of living is rapidly increasing – and that includes the cost of energy. It is also apparent that the environmental costs of continuing to use fossil fuels are now reaching a point where if human beings do not wean themselves off these fuels then the damage to the planet could be irreversible.
These are among the challenges that face those committed to the use of renewable energy – how can the costs of renewables be brought down and what steps can be taken to reduce the use of fossil fuels?
One of the solutions is solar power. The technology used to provide electricity from the thermal rays of the sun is steadily becoming more advanced, efficient, and cost-effective. Solar farms consist of many photovoltaic (PV) solar panels. These absorb energy from the sun and convert it to electricity which is fed to the grid. This is accomplished by three different types of ‘Concentrated Solar Power’ (CSP plants) — the compact linear fresnel reflector, the parabolic trough, and the power tower. These plants use highly reflective mirrors that focus the sun’s thermal energy on a single point (for example the Power Tower). This heats water stored at that point and produces steam that is used to power traditional steam turbines. It is efficient and produces no Greenhouse gases that can harm the environment.
This arrangement differs from the household solar arrays that are becoming more and more popular. The household systems use two thin silicon sheets that act like a battery. One is positively charged, and the other is negatively charged. When the two layers are joined and exposed to sunlight, an electrical current is produced. It should be noted that these solar farms produce enough thermal energy output to ensure that steam is produced even after night has fallen. The water remains hot enough for power generation several hours into the night.
Thermal storage units increase the availability of energy and can be particularly useful when the regional grid is under strain due to adverse weather conditions or higher than expected consumption.
In many cases, the production cost and consumption costs of using solar power compare extremely favourably with fossil fuel (such as coal) power plants. As efficiency improves so does the number of solar farms. Today there are solar farms with modest outputs that supply power to a few homes and mega-farms that can meet the power requirements of thousands of households.
However solar farms do present challenges. Reliable access to high levels of thermal output of the sun (i.e. sunshine) is limited to a number of geographical areas. these areas currently include Southern California, New Mexico, Arizona, and West Texas.
Renewable energy sources such as wind, solar, and biomass use has grown rapidly in recent years, fueled by ever-increasing technological innovation and consumer demand. Whereas in decades past the move to renewable was driven (in part) by the expected coming scarcity of fossil fuels. today that growth is driven by environmental issues and increased consumer awareness of the damage that fossil fuels are doing to the planet. It is a trend that shows no sign of weakening anytime soon.
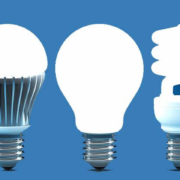
Great Energy-Efficient Lightbulbs For The Home
Household expenses are on the rise – anyone who has perused a news site will be aware that the cost of living is only going to continue for the foreseeable. In the face of this ever-escalating financial pressure, homeowners are in search of ways to trim household expenses.
One of the contributing factors to household overheads is electricity. That will become readily apparent should place your monthly electricity next to each other and track the change over the past year. Lighting contributes around 15% of electricity use in an average home.
Energy- efficient lightbulbs can significantly reduce the impact of lighting on household finances.
However, choosing just which type of energy-efficient bulb would best suit your individual requirements can be challenging. There are different types of energy-efficient lightbulbs on the market today and a variety of leading manufacturers.
Let’s take a closer look at the types of energy-efficient bulbs that are easily available – and some of the makes and models (in each class) that have received excellent consumer reviews.
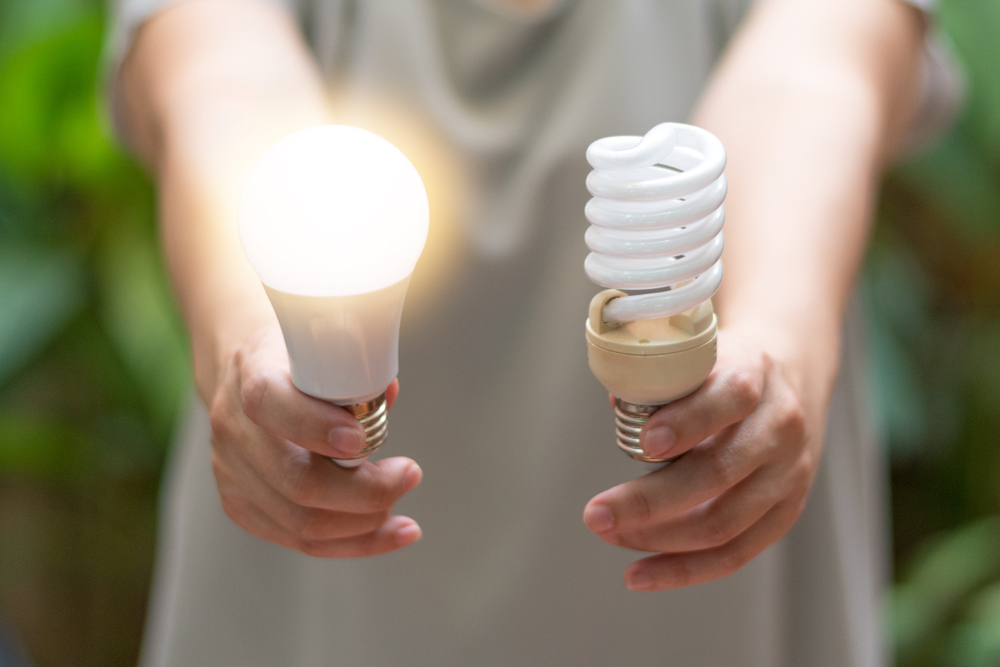
The first type of energy-efficient lightbulbs on the market is the Light emitting diode (LEDs).
These bulbs are known as ‘solid-state’ lighting. Meaning they convert electricity into light using semiconductors. Advances in LED lightbulb design have resulted in these bulbs becoming the most energy-efficient lightbulbs that money can buy. The statistics are staggering. Studies have shown that a house fitted with LED bulbs can cut its lighting bill by 90%. In addition, these lights last for 25 times longer than old-school incandescent bulbs.
These are some LED lightbulbs worth considering:
1. The Cree 60W Equivalent Dimmable DaylightLED Light Bulb. Scores consistently high with consumers due to its clear light and dimming ability.
2. The Energetic A19 LED Light Bulb – 2700K Soft White. If you want to save money upfront then this budget choice is for you.
The second class of energy-efficient lightbulbs is ‘compact fluorescent lightbulbs (CFLs). These bulbs supply light by passing an electric current through a mix of Argon and Mercury vapor. This process results in the emission of ultraviolet light that strikes the fluorescent coat on the inside surface of the bulb, emitting visible light.
These bulbs are cheaper than LEDs – but they also do not cut down on household electricity as efficiently as LEDs. The bulbs can still deliver a still impressive 70% reduction in energy use. They do require a very short period of time to allow the optimum flow of electricity – but then that 70% saving kicks in.
Some Excellent CFL Choices:
1. The SYLVANIA 48″ T8 Octron 32W Fluorescent Tube ‘Ecologic’ Lamp. High marks for color rendering and incredible value for money.
2. Philips CFL Energy Saver Light Bulbs. Great price and available in various wattage/color temperature variants.
Using less energy is great for your household budget – but it’s also an eco-aware choice. Energy-saving lightbulbs last longer than traditional bulbs and are available in models that allow you to adjust brightness – or if that is not required then there is an incredible range of lightbulbs that emit various levels of light.
Monthly savings have never been this easy. Switch to energy-efficient bulbs and change your life – not your bulbs.